среда, 26 февраля 2014 г.

VLC 2.2 http lua interface || nginx basic auth upstream


Yesterday i updated VLC from version 2.0.8 to 2.2 nightie. As i expected, this broken some things. Developers of http lua interface decided that i NEED to have password to access web-interface of VLC. Good idea, but why they didn't done this before? On the days of version 2.0 i came to same idea, and added nginx proxy in front of vlc remote http interface. And auth was done on nginx behalf. Another bad thing - you can only set http interface password, but not login. Login will be always blank. And i told all the users login/password combination and not wanted to tell everyone new combinaton of ""/password. SO! I'll do basic auth at nginx upstream section.
/etc/nginx/sites-enabled/vlc
server {

  listen   0.0.0.0:80;

  server_name  _;

  location / {
    proxy_pass        http://127.0.0.1:8080/;
    proxy_redirect    off;
    proxy_set_header  Host             $http_host;
    proxy_set_header  X-Real-IP        $remote_addr;
    proxy_set_header  X-Forwarded-For  $proxy_add_x_forwarded_for;
    proxy_set_header Authorization "Basic OjEyMzQ1Ng==";
    auth_basic            "closed site";
    auth_basic_user_file  htpasswd;
  }
}
Interested line in config is:
proxy_set_header Authorization "Basic OjEyMzQ1Ng==";
OjEyMzQ1Ng== - is a hash from login:password, you can generate it in console window:
$ echo ":123456" | base64
OjEyMzQ1Ngo=
But vlc doesn't accept that hash, so i will sniff http trafic from my browser to vlc interface, directly, without nginx:
# tcpdump -n -w - -i en0 host 10.12.34.56 | strings | grep -i Basic
tcpdump: listening on en0, link-type EN10MB (Ethernet), capture size 65535 bytes
Authorization: Basic OjEyMzQ1Ng==
Don't know why is it so, but in this hash there is one char less and additional = char in the end of string.
Example vlc runit script, just in case: /etc/sv/vlc/run
#!/bin/bash
PLAYLIST="/home/vlc/playlist.m3u"
killall vlc
killall cvlc

exec 2>&1

exec /bin/su - vlc -l -c "taskset 8 cvlc --http-password=123456 -vv -I http $PLAYLIST"
taskset 8(process will be assigned to 4rd core, 2^3) is workaround for old bug that exist in VLC(or, at least, existed earlier): VLC player with high uptime, when linux kernel scheduler moves vlc process from core to another core and back, sound output becomes stuttering. This workaround fixes this.

VLC 2.2 http lua interface || nginx basic auth upstream


Случилось тут вдруг обновить VLC с 2.0.8 на ночную сборку 2.2. Был неприятно удивлен, умные разработчики внезапно внедрили ОБЯЗАТЕЛЬНУЮ защиту паролем веб-интерфейса. Спасибо, конечно! Но пользователь не предусмотрен, только пароль. Но что мешало сделать это раньше, из-за чего пришлось колхозить перед vlc nginx с basic авторизацией по логин-паролю? А т.к. теперь у всех есть комбинация login/password для морды и всем сообщать новые реквизиты для входа не хотелось, то будем делать авторизацию на уровне upstream в nginx! /etc/nginx/sites-enabled/vlc
server {

  listen   0.0.0.0:80;

  server_name  _;

  location / {
    proxy_pass        http://127.0.0.1:8080/;
    proxy_redirect    off;
    proxy_set_header  Host             $http_host;
    proxy_set_header  X-Real-IP        $remote_addr;
    proxy_set_header  X-Forwarded-For  $proxy_add_x_forwarded_for;
    proxy_set_header Authorization "Basic OjEyMzQ1Ng==";
    auth_basic            "closed site";
    auth_basic_user_file  htpasswd;
  }
}
Интересующая строчка тут:
proxy_set_header Authorization "Basic OjEyMzQ1Ng==";
OjEyMzQ1Ng== - это хеш от пары login:password, их можно сгенерить и ручками в консоли:
$ echo ":123456" | base64
OjEyMzQ1Ngo=
Вот только vlc не прожевывает такой хеш, поэтому пришлось снифать что передает браузер если обратиться к vlc напрямую, без nginx:
# tcpdump -n -w - -i en0 host 10.12.34.56 | strings | grep -i Basic
tcpdump: listening on en0, link-type EN10MB (Ethernet), capture size 65535 bytes
Authorization: Basic OjEyMzQ1Ng=
Не знаю, почему, но на один символ оказалось меньше и с дополнительным знаком = в конце. Ну и заодно оставлю тут примерный ранит-скрипт для vlc: /etc/sv/vlc/run
#!/bin/bash
PLAYLIST="/home/vlc/playlist.m3u"
killall vlc
killall cvlc

exec 2>&1

exec /bin/su - vlc -l -c "taskset 8 cvlc --http-password=123456 -vv -I http $PLAYLIST"
taskset 8(указание что процесс будет привязан к 4-му ядру, 2^3) тут не просто так - существует(по крайней мере, раньше существовал) известный баг, который проявляется при большом аптайме vlc - когда шедулер ядра начинает швырять vlc с ядра на ядро, vlc сносит крышу и звук начинает заикаться.

четверг, 13 февраля 2014 г.

Your own skype notification bot, part two


So, it's time to add some kind of interface to push messages to skype-daemon. I'll use small but powerful enough cgi-supporting mini-httpd. Mini-httpd used in many soho routers in embedded environments since early 2000-s i think. So it's proofed itself to be stable and secure.
I would use this server as cgi-server for my dirty-written bash scripts :)

Install mini-httpd:

root@skype:/# aptitude install mini-httpd

Modify config file: /etc/mini-httpd.conf
port=8880
user=skype
chroot
dir=/home/skype/
data_dir=/cgi
cgipat=*.cgi
logfile=/home/skype/mini-httpd.log
pidfile=/home/skype/mini-httpd.pid
charset=utf-8
Runit-script: /etc/sv/mini-httpd/run
#!/bin/bash

TIME="Finished. Process took %E. %P CPU was eaten. %MK memory was used." # time stuff

name=`basename $(dirname $(pwd)/fake)` # ugly hack
workingdir="/home/skype/"
command="/usr/sbin/mini-httpd -C /etc/mini-httpd.conf -D"
exec 2>&1

echo starting $name...
export TIME
set -x
cd $workingdir
exec chpst -v time $command
Don't forget to enable runit-job for mini-httpd.

Create needed directories:
root@skype:/# su - skype

skype@skype:~$ mkdir -p /home/skype/cgi/

skype@skype:~$ cd /home/skype/cgi/
Create web cgi scripts(and don't forget to set executable bit on them) sendim.cgi
#!/bin/bash
printf "Content-type: text/html\n\n"
set -- $QUERY_STRING


../addcontact.sh "$1"
index.cgi
#!/bin/bash
printf "Content-type: text/html\n\n"
echo "Go away"
sendim.cgi
#!/bin/bash
if [ "$REQUEST_METHOD" = "POST" ]; then
    if [ "$CONTENT_LENGTH" -gt 0 ]; then
        read -n $CONTENT_LENGTH POST_DATA <&0
    fi
else
  printf "Content-type: text/html\n\n"
  echo "use POST"
  exit 0
fi

printf "Content-type: text/html\n\n"

set -- $QUERY_STRING

../sendim.sh "$1" "$POST_DATA"
Test it! Run from your main computer's console:
~ $ curl -d "Hello from curl" 'http://ipaddress:8880/sendim.cgi?skypename'
Test auth request script:
~ $ curl 'http://ipaddress:8880/addcontact.cgi?skypename'
That's it. Skype server is ready to serve you! PS These scripts could contain some vulnerables, because i didn't validate input at all, so allow access to web-server on your firewall(iptables) only for trusted networks. If you found vulns and know how to fix them, feel free to contact me in comments.

Пишем свою систему уведомлений через skype, часть 2


Итак настало время добавить какой-то интерфейс для того чтобы делать push в скайп-сервер. Для этого пригодится хорошо себя зарекомендовавший маленький http-сервер mini-httpd, который нашел приют на многих-многих роутерах в качестве веб-сервера для веб-интерфейса роутера.
А использовать мы его будем как веб для наших cgi-скриптов, написанных на… bash :) Коряво? Не то слово! С другой стороны, работает и ладно.

Установим mini-httpd:

root@skype:/# aptitude install mini-httpd

/etc/mini-httpd.conf
port=8880
user=skype
chroot
dir=/home/skype/
data_dir=/cgi
cgipat=*.cgi
logfile=/home/skype/mini-httpd.log
pidfile=/home/skype/mini-httpd.pid
charset=utf-8
/etc/sv/mini-httpd/run
#!/bin/bash

TIME="Finished. Process took %E. %P CPU was eaten. %MK memory was used." # time stuff

name=`basename $(dirname $(pwd)/fake)` # ugly hack
workingdir="/home/skype/"
command="/usr/sbin/mini-httpd -C /etc/mini-httpd.conf -D"
exec 2>&1

echo starting $name...
export TIME
set -x
cd $workingdir
exec chpst -v time $command
Не забываем включить ранит-службу mini-httpd.

Создадим нужные директории:
root@skype:/# su - skype

skype@skype:~$ mkdir -p /home/skype/cgi/

skype@skype:~$ cd /home/skype/cgi/
Создадим наши скрипты. sendim.cgi
#!/bin/bash
printf "Content-type: text/html\n\n"
set -- $QUERY_STRING


../addcontact.sh "$1"
index.cgi
#!/bin/bash
printf "Content-type: text/html\n\n"
echo "Go away"
sendim.cgi
#!/bin/bash
if [ "$REQUEST_METHOD" = "POST" ]; then
    if [ "$CONTENT_LENGTH" -gt 0 ]; then
        read -n $CONTENT_LENGTH POST_DATA <&0
    fi
else
  printf "Content-type: text/html\n\n"
  echo "use POST"
  exit 0
fi

printf "Content-type: text/html\n\n"

set -- $QUERY_STRING

../sendim.sh "$1" "$POST_DATA"
Не забываем сделать файлы исполняемыми и проверяем! Запустим со своего компьютера:
~ $ curl -d "Hello from curl" 'http://ipaddress:8880/sendim.cgi?skypename'
А если нужно выполнить запрос авторизации, то:
~ $ curl 'http://ipaddress:8880/addcontact.cgi?skypename'
Вот и все, готово! Скрипты вполне вероятно содержат какие-то уязвимости, поэтому не забываем ограничить доступ к серверу с помощью iptables.

среда, 12 февраля 2014 г.

Your own skype notification bot, part one

Once upon a time i start dreaming about my own skype bot. I could set up message forwarding from any sources, going right into my skypeid. I will describe all my steps to make my dream came true :) In this article i will run skype-client under linux virtual container. OpenVZ, 32bit, Debian wheezy. Here we go.

# aptitude install x11vnc xfvb runit

# wget http://www.skype.com/go/getskype-linux-deb-32

# dpkg -i skype.deb

# aptitude install

The following actions will resolve these dependencies:

     Remove the following packages:
1)     skype

Accept this solution? [Y/n/q/?] n
The following actions will resolve these dependencies:

      Install the following packages:

On this step all needed packages will be installed. Next stop: creating runit-scripts for our daemons. Runit-script for virtual X-server:
# mkdir -p /etc/sv/Xvfb/
# $EDITOR /etc/sv/Xvfb/run
with following contents:
#!/bin/bash


exec 2>&1
exec Xvfb
Make run script executable and activate runit-job:
# chmod a+x /etc/sv/Xvfb/run

# ln -s /etc/sv/Xvfb/ /etc/service/Xvfb

# sv status Xvfb
run: Xvfb: (pid 20111) 5s
Allright, our virtual X-Server is running for 5 seconds, all goes well.

We need to prepare everything to run our skype-client instance:
# adduser skype

# aptitude install git python-setuptools python-dbus python-gobject dbus-x11

# git clone https://github.com/awahlig/skype4py.git   

# cd skype4py

# python setup.py install 
If there's no errors, run VNC server:
# export DISPLAY=":0"

# x11vnc & 

# su - skype
Create skype helper scripts.
sendim.py
# -*- coding: utf-8 -*-
import Skype4Py
import sys
# Create an instance of the Skype class.
skype = Skype4Py.Skype()
# Connect the Skype object to the Skype client.
skype.Attach()
user = sys.argv[1]
msg = ' '.join(sys.argv[2:])
message = skype.SendMessage(user, msg)
print sys.argv[1]
print sys.argv[2:]

sendim.sh
#!/bin/bash

export DISPLAY=:0
export VERSIONER_PYTHON_PREFER_32_BIT=yes
echo "$@" >> /tmp/sendimsh.log

python ~skype/sendim.py "$@"
Make file executable and run skype:
# chmod a+x sendim.sh

# export DISPLAY=“:0”

# skype
On this step you will need to have VNC-client. Run it and connect to your VNC server. And you have to register skypeid for your bot. Head to https://login.skype.com/account/signup-form, and register new account. Then switch to vnc client window and accept skype terms and conditions for skype client. Enter your skypeid and pass and don't forget to set check on remember password.

Open new terminal window and check if everything is working. You'll see new windows asking for permissions to control skype. Accept it, don't forget to set check in checkbox.
# su - skype

# sendim.sh skypename test


Now you need addition helper scripts for making authorization requests.
addcontact.py
# -*- coding: utf-8 -*-
import Skype4Py
import sys
# Create an instance of the Skype class.
skype = Skype4Py.Skype()
# Connect the Skype object to the Skype client.
skype.Attach()
#user = sys.argv[1]
#msg = ' '.join(sys.argv[2:])
#message = skype.SendMessage(user, msg)
print sys.argv[1]
print sys.argv[2:]

client = Skype4Py.client.Client(skype)
client.OpenAddContactDialog(sys.argv[1])
client.ButtonReleased(1)
addcontact.sh
#!/bin/bash

export DISPLAY=:0
export VERSIONER_PYTHON_PREFER_32_BIT=yes
echo "$@" >> /tmp/addcontact.log

python ~skype/addcontact.py "$1"
sleep 3
WID=$(xdotool search "Say hello to $1")
xdotool windowactivate $WID
xdotool key "0x020"
At this step you will need addition package xdotool because i didn't managed how to close outbound contact request window without dirty hacks. And attitional package - fluxbox window manager, because xdotool doesn't work without WM:
# aptitude install xdotool fluxbox
Switch to root user and create runit-job for fluxbox Don't forget to make script executable.
# mkdir /etc/sv/fluxbox

# $EDITOR /etc/sv/fluxbox/run
With following contents:
#!/bin/bash

TIME="Finished. Process took %E. %P CPU was eaten. %MK memory was used." # time stuff

name=`basename $(dirname $(pwd)/fake)` # ugly hack
workingdir="/home/skype/"
command="su - skype -c /usr/bin/fluxbox -- --replace"
export DISPLAY=":0"
exec 2>&1

echo starting $name...
export TIME
set -x
cd $workingdir
exec chpst -v time $command
# chmod +x /etc/sv/fluxbox/run

# ln -s /etc/sv/fluxbox/ /etc/service/fluxbox
After issuing last command you'll notice WM appearance in vnc window. Login under skype user and try to send auth request to your skypeid. In this example your skypeid will be testname:
# ./addcontact.sh testname
In your vnc-window you will notice outbound contact request windows appearance, then it will close. Switch to your skype client on your pc/mac and authorize inbound request, then switch back to remote console and send test message:
# ./sendim.sh testname "Hello Master"
You should receive message from your bot. Switch to VNC-window and quit from skype client. Final steps remaining - add skype client to autorun. And make sure your bot survives reboot. I left this on you, you should manage.
Script for runit-job:
#!/bin/bash

TIME="Finished. Process took %E. %P CPU was eaten. %MK memory was used." # time stuff

name=`basename $(dirname $(pwd)/fake)` # ugly hack
workingdir="/home/skype/"
command="su - skype -c /usr/bin/skype"
export DISPLAY=":0"
exec 2>&1

echo starting $name...
export TIME
set -x
cd $workingdir
exec chpst -v time $command

Пишем свою систему уведомлений через skype, часть 1

Однажды мне захотелось иметь своего скайп-бота, который мог бы форвардить мне сообщения из внешних источников. В первой статье я расскажу как запустить linux-клиент скайпа на виртуальной машинке и научиться отправлять сообщения с консоли желаемому собеседнику. Как всегда, openvz-контейнер, 32бита, debian wheezy. Поехали!

# aptitude install x11vnc xfvb runit

# wget http://www.skype.com/go/getskype-linux-deb-32

# dpkg -i skype.deb

# aptitude install

The following actions will resolve these dependencies:

     Remove the following packages:
1)     skype

Accept this solution? [Y/n/q/?] n
The following actions will resolve these dependencies:

      Install the following packages:

Все нужные пакеты, от которых зависит скайп будут установлены. Далее займемся ранит-скриптами для запуска наших демонов. Создадим скрипт для запуска виртуального X-сервера:
# mkdir -p /etc/sv/Xvfb/
# $EDITOR /etc/sv/Xvfb/run
Со следующим содержимым:
#!/bin/bash


exec 2>&1
exec Xvfb
Включим получившуюся службу runit:
# chmod a+x /etc/sv/Xvfb/run

# ln -s /etc/sv/Xvfb/ /etc/service/Xvfb

# sv status Xvfb
run: Xvfb: (pid 20111) 5s
Отлично, X-сервер запущен уже в течении 5 секунд, все идет по плану.

Продолжим, подготовим все для запуска скайп-бота:
# adduser skype

# aptitude install git python-setuptools python-dbus python-gobject dbus-x11

# git clone https://github.com/awahlig/skype4py.git   

# cd skype4py

# python setup.py install 
Если ошибок нет, продолжаем:
# export DISPLAY=":0"

# x11vnc & 

# su - skype
Теперь создадим скрипты для управления скайпом.
sendim.py
# -*- coding: utf-8 -*-
import Skype4Py
import sys
# Create an instance of the Skype class.
skype = Skype4Py.Skype()
# Connect the Skype object to the Skype client.
skype.Attach()
user = sys.argv[1]
msg = ' '.join(sys.argv[2:])
message = skype.SendMessage(user, msg)
print sys.argv[1]
print sys.argv[2:]

sendim.sh
#!/bin/bash

export DISPLAY=:0
export VERSIONER_PYTHON_PREFER_32_BIT=yes
echo "$@" >> /tmp/sendimsh.log

python ~skype/sendim.py "$@"
Делаем его исполняемым и запускаем скайп:
# chmod a+x sendim.sh

# export DISPLAY=“:0”

# skype
Подключаемся внц-клиентом к своему серверу. Идем на https://login.skype.com/account/signup-form, регистрируем новый аккаунт для бота. Соглашаемся с лицензионным соглашением. Вводим логин и пароль, не забываем поставить галочку. 
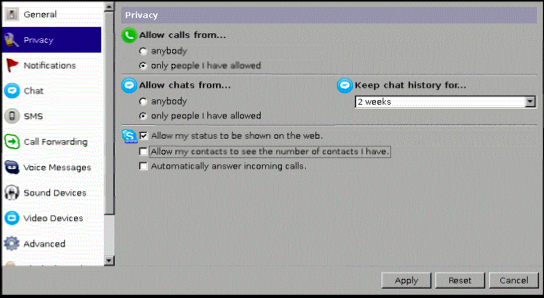
В настройках прайваси ставим устраивающие галки.

В соседнем окне терминала проверяем с помощью скрипта, должно выскочить уведомление о том что скайпом хочет управлять некая сила, соглашаемся, не забывая поставить галочку.
# su - skype

# sendim.sh skypename test


Теперь нам понадобится еще пара скриптов для отправки запросов авторизации контактам с консоли:
addcontact.py
# -*- coding: utf-8 -*-
import Skype4Py
import sys
# Create an instance of the Skype class.
skype = Skype4Py.Skype()
# Connect the Skype object to the Skype client.
skype.Attach()
#user = sys.argv[1]
#msg = ' '.join(sys.argv[2:])
#message = skype.SendMessage(user, msg)
print sys.argv[1]
print sys.argv[2:]

client = Skype4Py.client.Client(skype)
client.OpenAddContactDialog(sys.argv[1])
client.ButtonReleased(1)
addcontact.sh
#!/bin/bash

export DISPLAY=:0
export VERSIONER_PYTHON_PREFER_32_BIT=yes
echo "$@" >> /tmp/addcontact.log

python ~skype/addcontact.py "$1"
sleep 3
WID=$(xdotool search "Say hello to $1")
xdotool windowactivate $WID
xdotool key "0x020"
Соответсвенно понадобится еще один пакет, т.к. я ничего лучше не придумал, чем кликать по кнопке в интерфейсе. Для этого же понадобится оконный менеджер, т.к. без него xdotool не видит окон, я выбрал простецкий fluxbox:
# aptitude install xdotool fluxbox
Из-под рута создадим директорию под runit-службу fluxbox и скрипт для запуска. Сделаем исполняемым и активируем.
# mkdir /etc/sv/fluxbox

# $EDITOR /etc/sv/fluxbox/run
Со следующим содержимым:
#!/bin/bash

TIME="Finished. Process took %E. %P CPU was eaten. %MK memory was used." # time stuff

name=`basename $(dirname $(pwd)/fake)` # ugly hack
workingdir="/home/skype/"
command="su - skype -c /usr/bin/fluxbox -- --replace"
export DISPLAY=":0"
exec 2>&1

echo starting $name...
export TIME
set -x
cd $workingdir
exec chpst -v time $command
# chmod +x /etc/sv/fluxbox/run

# ln -s /etc/sv/fluxbox/ /etc/service/fluxbox
В окне внц-клиента должен появится оконный менеджер. Из-под пользователя skype отправим запрос авторизации самому себе(skypename у нас будет testname):
# ./addcontact.sh testname
В окне внц-клиента можно наблюдать как появится окно запроса и потом нажмется кнопка отправки. Авторизуем своего бота и пробуем что-нибудь себе отправить:
# ./sendim.sh testname "Ya tvoy sluga, ya tvoy rabotnik"
Должно придти сообщение. В внц-клиенте выходим из скайпа. Остались финальные штришки - добавить скайп в автозапуск. И убедиться что виртуалка/контейнер переживает перезагрузку. Это будет домашним заданием.
А вот работающий скрипт для ранит-задания.
#!/bin/bash

TIME="Finished. Process took %E. %P CPU was eaten. %MK memory was used." # time stuff

name=`basename $(dirname $(pwd)/fake)` # ugly hack
workingdir="/home/skype/"
command="su - skype -c /usr/bin/skype"
export DISPLAY=":0"
exec 2>&1

echo starting $name...
export TIME
set -x
cd $workingdir
exec chpst -v time $command

вторник, 11 февраля 2014 г.

U-boot mod for tp-link mobile routers

I have 3 different TP-Link mobile routers. I always wanted to dig into boot-loader, replace factory one with custom boot-loader from developer pepe2k. Github link

What's so special about this boot-loader? It has very nice killer-features like:
  • Embedded micro-http server. It allows firmware upload via browser for system image, boot-loader and radio calibration data named ART
  • UDP network console, allows you access boot-loader's command-line without uart-cable
  • Overclocking
  • Other handy stuff
Nice features, but developer does not offers fresh binary versions of boot-loader. Sad story. But i managed to compile these by myself. All you need to have is some mips-toolchain installed and then compile your own binaries.
I created 32-bit openvz-container(but debootstrap/chroot combination will be ok too) with debian wheezy. After googling for some time i found script for auto install toolchain.
#!/bin/sh
 
#
# Script name: setup_codesourcery.sh
# Version: 2.2 - 2012-07-19
#
# Copyright (C) 2009-2012 Matthias "Maddes" Buecher
#
 
#
# This program is free software; you can redistribute it and/or modify
# it under the terms of the GNU General Public License as published by
# the Free Software Foundation; either version 2 of the License, or
# (at your option) any later version.
# http://www.gnu.org/licenses/gpl-2.0.txt
#
# This program is distributed in the hope that it will be useful,
# but WITHOUT ANY WARRANTY; without even the implied warranty of
# MERCHANTABILITY or FITNESS FOR A PARTICULAR PURPOSE. See the
# GNU General Public License for more details.
#
# You should have received a copy of the GNU General Public License
# along with this program; if not, write to the Free Software
# Foundation, Inc., 59 Temple Place, Suite 330, Boston, MA 02111-1307 USA
#
 
 
##
## Script Functions
##
install_toolchain ()
{
BINPATH="${INSTALLPATH}/${VERSION}/bin"
SCRIPTFILE="${SCRIPTPATH}/${SCRIPTPREFIX}${VERSION}.sh"
DLFILE="${VERSION}${SUBVERSION}-${CCPREFIX}-i686-pc-linux-gnu.tar.bz2"
 
echo "Installing ${VERSION}:"
 
# # Download toolchain
[ ! -d "${DLDIR}" ] && mkdir -p "${DLDIR}"
wget -N -P "${DLDIR}" "${DLBASEPATH}/${CCPREFIX}/${DLFILE}"
 
# # Install toolchain (by extracting)
echo 'Extracting...'
[ ! -d "${INSTALLPATH}" ] && mkdir -p "${INSTALLPATH}"
tar -x --bzip2 -f "${DLDIR}"/"${DLFILE}" -C "${INSTALLPATH}"
 
# # Create toolchain environment script
echo "Creating script file ${SCRIPTFILE} ..."
cat >"${SCRIPTFILE}" << __EOF
#!/bin/sh
echo "Type 'exit' to return to non-crosscompile environment"
[ -n "\${CROSS_COMPILE}" ] && { echo "ALREADY in crosscompile environment for \${ARCH} (\${CROSS_COMPILE})"; exit; }
export PATH='${BINPATH}':\${PATH}
export ARCH='${ARCHCODE}'
export CROSS_COMPILE='${CCPREFIX}-'
echo "NOW in crosscompile environment for \${ARCH} (\${CROSS_COMPILE})"
/bin/bash
echo 'Back in non-crosscompile environment'
__EOF
[ ! -x "${SCRIPTFILE}" ] && chmod +x "${SCRIPTFILE}"
 
echo 'Done.'
}
 
 
###
### Install prerequisites
###
 
[ "`whoami`" != "root" ] && {
echo "$0: ABORT!!! Only for root user"
exit 1
}
 
# --> general buildtools & development packages
# wget & bzip2 for downloading and unpacking
# uboot's mkimage & devio for creating uImage
echo 'Installing prerequisites:'
PACKAGES='build-essential linux-libc-dev wget bzip2 uboot-mkimage devio ncurses-dev'
DOINSTALL=0
for PACKAGE in ${PACKAGES}
do
# # special cases
[ "${PACKAGE}" = "ncurses-dev" ] && PACKAGE="libncurses5-dev" ; # package ncurses-dev is virtual on Debian, which can not be found via dpkg
 
dpkg -l | grep -q -F -e "${PACKAGE}"
DOINSTALL=$?
[ "${DOINSTALL}" -ne 0 ] && break
done
[ "${DOINSTALL}" -ne 0 ] && {
apt-get update
apt-get install ${PACKAGES}
}
 
 
###
### Install toolchains
###
 
 
### Mentor Graphics' (ex-CodeSourcery) toolchains
### http://www.mentor.com/embedded-software/sourcery-tools/sourcery-codebench/lite-edition
### (navigation 2012: Products and/or Embedded Software --> Sourcery CodeBench [--> Lean more] [--> Editions] --> Sourcery CodeBench Lite Edition (at the bottom))
### (navigation 2011: Products --> Embedded Software --> Sourcery Tools --> Sourcery CodeBench --> Editions --> Lite Edition Download)
#
### before 2011:
### http://www.codesourcery.com/sgpp/lite_edition.html
### (navigation: Products --> Sourcery G++ --> Editions --> Lite)
#
### Note: the toolchains for the different targets can be installed in parallel
 
## Pathes for toolchains, scripts and downloads
INSTALLPATH='/usr/local/codesourcery'
SCRIPTPATH='/usr/local/bin'
SCRIPTPREFIX='codesourcery-'
DLDIR="/root/work/codesourcery"
#
DLBASEPATH='https://sourcery.mentor.com/public/gnu_toolchain/'
# before 2011: DLBASEPATH='http://www.codesourcery.com/public/gnu_toolchain/'
 
## -> ARM GNU/Linux target
ARCHCODE='arm'
CCPREFIX='arm-none-linux-gnueabi'
## (arm-2011.03-41)
VERSION='arm-2011.03'
SUBVERSION='-41'
install_toolchain
## (arm-2009q3-67)
VERSION='arm-2009q3'
SUBVERSION='-67'
#install_toolchain
## (arm-2009q1-203)
VERSION='arm-2009q1'
SUBVERSION='-203'
#install_toolchain
 
## -> MIPS GNU/Linux target
ARCHCODE='mips'
CCPREFIX='mips-linux-gnu'
## (mips-2011.03-93)
VERSION='mips-2011.03'
SUBVERSION='-93'
install_toolchain
## (mips-4.4-303)
VERSION='mips-4.4'
SUBVERSION='-303'
#install_toolchain
## (mips-4.3-154)
VERSION='mips-4.3'
SUBVERSION='-154'
#install_toolchain

Paste contents from listing above:
# $EDITOR ~/setup_codesourcery.sh
Make script executable:
# chmod +x ~/setup_codesourcery.sh
Execute script, it will install all dependencies automatically. Install additional dependencies for boot-loader compilation - default-jre-headless и git.
# apt-get install default-jre-headless git
Everything is ready, it's compile time! Let's compile loader for 703 model.
# git clone https://github.com/pepe2k/u-boot_mod.git
# cd u-boot_mod
# codesourcery-mips-2011.03.sh
# make tplink_wr703n
If everything's is okay you'll see something like this on your console:
Image Name:   u-boot image
Created:      Tue Feb 11 20:49:16 2014
Image Type:   MIPS Linux Firmware (lzma compressed)
Data Size:    43654 Bytes = 42.63 kB = 0.04 MB
Load Address: 0x80010000
Entry Point:  0x80010000
make[1]: Entering directory `/root/u-boot_mod'
-e
======= Preparing 64KB file filled with 0xFF... =======
64+0 records in
128+0 records out
65536 bytes (66 kB) copied, 0.000749393 s, 87.5 MB/s
-e
======= Copying U-Boot image... =======
114+1 records in
114+1 records out
58458 bytes (58 kB) copied, 0.000249334 s, 234 MB/s
-e
======= U-Boot image ready, size: 65536 bytes =======

make[1]: Leaving directory `/root/u-boot_mod'
Resulted files will be in "bin" directory:
# ls -1 bin/
README
uboot_for_tp-link_tl-mr3020.bin
uboot_for_tp-link_tl-mr3020.md5
uboot_for_tp-link_tl-wr703n.bin
uboot_for_tp-link_tl-wr703n.md5
uboot_for_tp-link_tl-wr720n_v3_CH.bin
uboot_for_tp-link_tl-wr720n_v3_CH.md5
Your freshly compiled boot-loader can be flashed with usb2uart cable using author's instructions
I will left here compiled files, if someone is too lazy to compile them by themselves. Check-sums:
87af702f1b4e241af74ade3b2d5964b0 uboot_for_tp-link_tl-mr3020.bin
cfba9d0299c2cfddcfd21d6b1292617a uboot_for_tp-link_tl-wr703n.bin
b7285673db0d0fa0320e81e37395f0b4 uboot_for_tp-link_tl-wr720n_v3_CH.bin
uboot_for_tp-link_tl-mr3020.bin
uboot_for_tp-link_tl-wr703n.bin
uboot_for_tp-link_tl-wr720n_v3_CH.bin


U-boot mod для компактных роутеров tp-link.

Являясь владельцем прекрасной россыпи роутеров от китайской чудо-фирмы TP-Link, давно хотел разобраться со встроенным загрузчиком в этих малышах, а именно влить в них кастомизированный загрузчик от польского разработчика pepe2k. Ссылка на гитхаб

А что такого особенного в этом загрузчике? Он добавляет настоящие такие киллер-фичи:
  • Встроенный микро-http сервер, позволяющий через браузер прошивать образ прошивки, загрузчик и служебную область ART
  • UDP-консоль, позволяет отправлять команды консоли загрузчика без uart-кабеля
  • "Разгон"
  • Второстепенные полезные мелочи
Казалось бы, все здорово, замечательно. Но нет, вредный поляк не выкладывает свежие бинарные версии загрузчиков. Не беда, собрал сам. Однако, процесс оказался муторным, нужно было поставить mips-тулчейн, и с его помощью собрать из исходников бинари загрузчика.
Была создана 32-битная openvz-виртуалка(подойдет и debootstrap/chroot) с debian wheezy. На просторах интернета был найден скрипт для автоматической установки тулчейна.
#!/bin/sh
 
#
# Script name: setup_codesourcery.sh
# Version: 2.2 - 2012-07-19
#
# Copyright (C) 2009-2012 Matthias "Maddes" Buecher
#
 
#
# This program is free software; you can redistribute it and/or modify
# it under the terms of the GNU General Public License as published by
# the Free Software Foundation; either version 2 of the License, or
# (at your option) any later version.
# http://www.gnu.org/licenses/gpl-2.0.txt
#
# This program is distributed in the hope that it will be useful,
# but WITHOUT ANY WARRANTY; without even the implied warranty of
# MERCHANTABILITY or FITNESS FOR A PARTICULAR PURPOSE. See the
# GNU General Public License for more details.
#
# You should have received a copy of the GNU General Public License
# along with this program; if not, write to the Free Software
# Foundation, Inc., 59 Temple Place, Suite 330, Boston, MA 02111-1307 USA
#
 
 
##
## Script Functions
##
install_toolchain ()
{
BINPATH="${INSTALLPATH}/${VERSION}/bin"
SCRIPTFILE="${SCRIPTPATH}/${SCRIPTPREFIX}${VERSION}.sh"
DLFILE="${VERSION}${SUBVERSION}-${CCPREFIX}-i686-pc-linux-gnu.tar.bz2"
 
echo "Installing ${VERSION}:"
 
# # Download toolchain
[ ! -d "${DLDIR}" ] && mkdir -p "${DLDIR}"
wget -N -P "${DLDIR}" "${DLBASEPATH}/${CCPREFIX}/${DLFILE}"
 
# # Install toolchain (by extracting)
echo 'Extracting...'
[ ! -d "${INSTALLPATH}" ] && mkdir -p "${INSTALLPATH}"
tar -x --bzip2 -f "${DLDIR}"/"${DLFILE}" -C "${INSTALLPATH}"
 
# # Create toolchain environment script
echo "Creating script file ${SCRIPTFILE} ..."
cat >"${SCRIPTFILE}" << __EOF
#!/bin/sh
echo "Type 'exit' to return to non-crosscompile environment"
[ -n "\${CROSS_COMPILE}" ] && { echo "ALREADY in crosscompile environment for \${ARCH} (\${CROSS_COMPILE})"; exit; }
export PATH='${BINPATH}':\${PATH}
export ARCH='${ARCHCODE}'
export CROSS_COMPILE='${CCPREFIX}-'
echo "NOW in crosscompile environment for \${ARCH} (\${CROSS_COMPILE})"
/bin/bash
echo 'Back in non-crosscompile environment'
__EOF
[ ! -x "${SCRIPTFILE}" ] && chmod +x "${SCRIPTFILE}"
 
echo 'Done.'
}
 
 
###
### Install prerequisites
###
 
[ "`whoami`" != "root" ] && {
echo "$0: ABORT!!! Only for root user"
exit 1
}
 
# --> general buildtools & development packages
# wget & bzip2 for downloading and unpacking
# uboot's mkimage & devio for creating uImage
echo 'Installing prerequisites:'
PACKAGES='build-essential linux-libc-dev wget bzip2 uboot-mkimage devio ncurses-dev'
DOINSTALL=0
for PACKAGE in ${PACKAGES}
do
# # special cases
[ "${PACKAGE}" = "ncurses-dev" ] && PACKAGE="libncurses5-dev" ; # package ncurses-dev is virtual on Debian, which can not be found via dpkg
 
dpkg -l | grep -q -F -e "${PACKAGE}"
DOINSTALL=$?
[ "${DOINSTALL}" -ne 0 ] && break
done
[ "${DOINSTALL}" -ne 0 ] && {
apt-get update
apt-get install ${PACKAGES}
}
 
 
###
### Install toolchains
###
 
 
### Mentor Graphics' (ex-CodeSourcery) toolchains
### http://www.mentor.com/embedded-software/sourcery-tools/sourcery-codebench/lite-edition
### (navigation 2012: Products and/or Embedded Software --> Sourcery CodeBench [--> Lean more] [--> Editions] --> Sourcery CodeBench Lite Edition (at the bottom))
### (navigation 2011: Products --> Embedded Software --> Sourcery Tools --> Sourcery CodeBench --> Editions --> Lite Edition Download)
#
### before 2011:
### http://www.codesourcery.com/sgpp/lite_edition.html
### (navigation: Products --> Sourcery G++ --> Editions --> Lite)
#
### Note: the toolchains for the different targets can be installed in parallel
 
## Pathes for toolchains, scripts and downloads
INSTALLPATH='/usr/local/codesourcery'
SCRIPTPATH='/usr/local/bin'
SCRIPTPREFIX='codesourcery-'
DLDIR="/root/work/codesourcery"
#
DLBASEPATH='https://sourcery.mentor.com/public/gnu_toolchain/'
# before 2011: DLBASEPATH='http://www.codesourcery.com/public/gnu_toolchain/'
 
## -> ARM GNU/Linux target
ARCHCODE='arm'
CCPREFIX='arm-none-linux-gnueabi'
## (arm-2011.03-41)
VERSION='arm-2011.03'
SUBVERSION='-41'
install_toolchain
## (arm-2009q3-67)
VERSION='arm-2009q3'
SUBVERSION='-67'
#install_toolchain
## (arm-2009q1-203)
VERSION='arm-2009q1'
SUBVERSION='-203'
#install_toolchain
 
## -> MIPS GNU/Linux target
ARCHCODE='mips'
CCPREFIX='mips-linux-gnu'
## (mips-2011.03-93)
VERSION='mips-2011.03'
SUBVERSION='-93'
install_toolchain
## (mips-4.4-303)
VERSION='mips-4.4'
SUBVERSION='-303'
#install_toolchain
## (mips-4.3-154)
VERSION='mips-4.3'
SUBVERSION='-154'
#install_toolchain

Создаем файл, вставляем скопированный скрипт внутрь:
# $EDITOR ~/setup_codesourcery.sh
Делаем его исполняемым:
# chmod +x ~/setup_codesourcery.sh
Запускаем, он должен скачать все необходимые пакеты. Дополнительно ставим еще пакеты default-jre-headless и git.
# apt-get install default-jre-headless git
После этого радостно бежим собирать уже наш загрузчик. Например, для 703-го роутера.
# git clone https://github.com/pepe2k/u-boot_mod.git
# cd u-boot_mod
# codesourcery-mips-2011.03.sh
# make tplink_wr703n
Все должно завершиться успешно с приблизительно следующим выводом на экран:
Image Name:   u-boot image
Created:      Tue Feb 11 20:49:16 2014
Image Type:   MIPS Linux Firmware (lzma compressed)
Data Size:    43654 Bytes = 42.63 kB = 0.04 MB
Load Address: 0x80010000
Entry Point:  0x80010000
make[1]: Entering directory `/root/u-boot_mod'
-e
======= Preparing 64KB file filled with 0xFF... =======
64+0 records in
128+0 records out
65536 bytes (66 kB) copied, 0.000749393 s, 87.5 MB/s
-e
======= Copying U-Boot image... =======
114+1 records in
114+1 records out
58458 bytes (58 kB) copied, 0.000249334 s, 234 MB/s
-e
======= U-Boot image ready, size: 65536 bytes =======

make[1]: Leaving directory `/root/u-boot_mod'
Полученные файлы теперь должны храниться в директории bin:
# ls -1 bin/
README
uboot_for_tp-link_tl-mr3020.bin
uboot_for_tp-link_tl-mr3020.md5
uboot_for_tp-link_tl-wr703n.bin
uboot_for_tp-link_tl-wr703n.md5
uboot_for_tp-link_tl-wr720n_v3_CH.bin
uboot_for_tp-link_tl-wr720n_v3_CH.md5
Влить новый загрузчик с помощью консольного кабеля usb2uart можно по инструкции автора
На всякий случай оставлю тут полученные файлы. Контрольные суммы:
87af702f1b4e241af74ade3b2d5964b0 uboot_for_tp-link_tl-mr3020.bin
cfba9d0299c2cfddcfd21d6b1292617a uboot_for_tp-link_tl-wr703n.bin
b7285673db0d0fa0320e81e37395f0b4 uboot_for_tp-link_tl-wr720n_v3_CH.bin
uboot_for_tp-link_tl-mr3020.bin
uboot_for_tp-link_tl-wr703n.bin
uboot_for_tp-link_tl-wr720n_v3_CH.bin